Hey there, let’s cut through the corporate noise and talk about something our stamping robot customers ask ALL the time: how to actually swap a stamping die on one of these bad boys. Look, I get it—you didn’t buy a 6-axis stamping bot to spend 2 hours fumbling around with tools when a die needs changing. As a stamping robot supplier, I’ve worked with shops from small jobbing firms to massive auto parts factories, and I’ve seen way too many guys mess this up and either scratch a die, damage the robot’s end effector, or even hurt themselves. This stuff doesn’t have to be hard—we’re gonna walk through it like we’re grabbing coffee, no jargon, just real tips from the team that builds and fixes these machines every single day. Stamping Robot
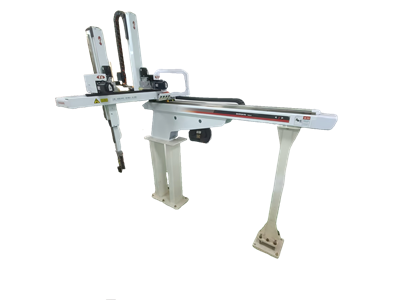
First off, let’s get one thing straight: changing a stamping die is NOT like swapping a coffee filter on your work Keurig. You can’t rush this if you don’t wanna end up with a broken $10k die or a robot out of commission for a week. The biggest mistake new operators make? Skipping the pre-check because they think “this machine’s been running fine all week.” Nah—prepping is 50% of the job, and it saves you from half the headaches later. Let’s break this down step by step, no fancy acronyms (unless we’re talking common ones we all use, like E-stop, which I hope you know), and keep it relatable.
First, the pre-change checklist—write this on a sticky note and tape it to your robot teach pendant, seriously. I don’t care if you “remember” everything. First: Kill ALL power. Not just the robot button, not just the press—cut the main breaker for the stamping cell. I’ve seen a guy reach in to unbolt a die, the apprentice had leaned on the “cycle start” button, and his hand almost got crushed. E-stops are great, but dead is dead. Second: Verify the die is completely lowered and resting on the cell’s base blocks, not hanging half-way from the robot. If it’s dangling, it can shift when you unbolt it, and that’s how you scuff the die’s precision surfaces. Third: Grab your tool kit specific to your die bolts—no adjustable wrenches, use the hex keys or torque bits we included with your machine. Adjustable ones slip, and you’ll round a bolt head so bad you’ll have to drill it out later. Fourth: Do a quick visual check of the end effector (that’s the gripper on the robot arm) to make sure it’s clean—no leftover stamping shavings or oil gunk. That gunk can make the die slide when you lift it, and bam, another scratch.
Okay, now you’re prepped—let’s actually get the old die off. Once power is off, the first thing is disconnecting any air or electrical lines hooked to the die. A lot of dies have sensors or pneumatic pins that line up with the press, so those lines can’t stay connected. Pro tip from our team: mark the lines with a sharpie where they plug into the die’s ports. New operators mix them up all the time, and then the new die’s sensors won’t work because you plugged the pressure line into the sensor port. Next, unbolt the die from the end effector. Most dies use four main bolts, but some have extra alignment pins—don’t yank the die before you remove those pins. Those pins keep the die aligned perfectly, so if you leave one in, you’ll bend it trying to pull the die, and that kills precision. When you’re unbolting, go crisscross, not side-to-side. Like loosening a tire lug—if you loosen one all the way before the others, the die will shift and bind on the alignment pins. Take it slow, loosen each bolt a quarter turn at a time, until they’re all free.
Now, the part that trips everyone up: lifting the old die with the robot. Wait a second—don’t just crank the robot up once the bolts are off. First, manually jog the robot (use the teach pendant, not auto mode!) to make sure the gripper’s jaws are fully released from the die’s lifting holes. If the jaws are only partially engaged, the die will tilt when you lift it, and you’ll either drop it (bad) or bend the end effector (worse). Once it’s fully engaged, lift it just enough to clear the base blocks by 2-3 inches—no higher, you’re just wasting time, and a sudden bump in the cell could knock it. Then, jog the robot slowly to the designated die storage area—we mark those spots on the floor with yellow tape for a reason. Park the die there, lower it gently to rest on the storage rack, and release the gripper. Double-check the die is stable, not wobbly, and you’re good to go.
Okay, the fun part (okay, maybe not fun, but the main event) putting the new die on. First, let’s do the pre-check for the new die, even if it’s new out of the box. Wipe down the mating surfaces on the die and the press’s base blocks with a clean rag—any leftover shavings from the last job will cause the new die to sit unevenly, which messes up the stamped parts. Also, confirm the alignment pins on the die match the holes in the press base. Again, sharpie tip—if the die has matching number stamps on its mounting corners, check that those line up with the press’s marks. I can’t tell you how many times a new die came with a misprinted label, and the operator tried to force it on, breaking a pin.
Now, jog the robot back from storage to grab the new die. Same rule: fully engage the gripper jaws, lift just enough to clear the rack, no more. Now, move it slowly over the press’s base—here’s the big one: use the alignment pins to guide it in, not force the bolts. Most guys rush this and try to line up the bolts first, which can bend pins or strip the holes. The pins should slip right into their holes with light pressure. If they don’t, lift the die a tiny bit, adjust the robot’s position ¼ inch, and try again. When the die is sitting perfectly on the base blocks, hand-thread the four main bolts until they’re snug—don’t use a wrench yet. This lets the die self-align a little, so you don’t have to force bolts. Once all four are hand-threaded, grab your torque wrench and tighten them in that same crisscross pattern we talked about earlier. And follow the torque spec we gave you—don’t guess! Too tight, and the bolt will snap (ask us how we know—we had a customer once who tightened to “max feel” and snapped a bolt, which chipped the press’s base and cost $2k to fix). Too loose, and the die will shift when stamping, ruining parts and even damaging the robot over time. We put the torque spec on a sticker on your teach pendant, use it.
Now, reconnect those air and electrical lines—remember your sharpie marks? That’s why they matter. Plug each line into the correct port, and give them a gentle tug to make sure they’re secure. Most lines have a little clip, so push until you hear it click. Now, here’s a step I can’t stress enough: test the die before you hit auto mode. Put the press in manual mode, jog the ram down a tiny bit to make sure all the sensors on the die are working. If you have a light curtain or a safety sensor on the die, wave your hand in front of it to confirm it triggers an E-stop. I’ve seen operators skip this, start auto mode, and the die’s sensor was backwards, so it crushed a part and damaged the ram. That’s a $15k fix for a 2-minute test.
Once that’s all good, do a test run. Make a single dummy part with scrap material—we always recommend keeping a stack of scrap in the cell for this. Run one cycle, check the part for accuracy, check that the die didn’t shift, check that the robot’s path lined up with the new die. If everything looks good, you’re ready to go back to production.
Wait, I know some of you are thinking, “That’s all? What about when I’m in a pinch and need to swap dies faster?” Look, speed kills here, but we do have a few pro tips that shave 10-15 minutes off the process without risking damage. First: keep your die kit organized. We supply a die change cart with labeled compartments for each size bolt, your torque wrench, and the sharpie—use it. Digging for a hex key when power’s off wastes time. Second: pre-mark all your die’s alignment pins and line numbers when you install a new die the first time, so you don’t have to do that every swap. Third: if your stamping robot has a quick-change gripper (we sell these as an add-on, by the way), that cuts the bolt-loosening time by half—no more unbolting and re-bolting the gripper, it just clicks on and off.
Before I wrap this up, let’s hit the most common mistakes I’ve seen over my time as a stamping robot supplier. Number one: skipping the power disconnection. I can’t emphasize this enough—last year we had a customer who didn’t kill the main breaker, leaned in to adjust a die, and the cycle start kicked in. He lost two fingers. That’s not a story to scare you, that’s a reality check. Number two: not using the crisscross tightening pattern. So many guys tighten bolts one after another, and the die warps a tiny bit, leading to misaligned stamped parts. Number three: not testing the die after install. It’s 2 minutes, saves hours of downtime. Number four: rushing the alignment pins. If they don’t slip in easily, you’re forcing something, and that’s when things break.
If you’re running a stamping shop and this feels like a lot, or if you’re tired of dealing with slow, unreliable die changes that eat into production time—let’s chat. Our team knows every stamping robot model we build, and we can help you set up a die change routine that works for your shop, whether you’re a small 2-cell operation or a 10-line factory. We also sell quick-change end effectors and pre-configured die change carts that make this whole process faster and safer, no guesswork. No pushy sales calls, no hidden fees—just real advice from people who work with these machines every day.
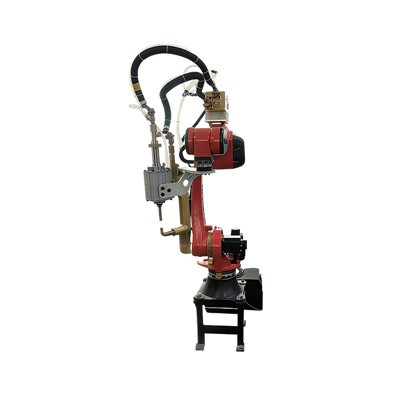
Now, before you go, a quick reality check: changing a stamping die isn’t rocket science, but it does require patience and attention to detail. Rushing it leads to broken parts, damaged equipment, and injuries. Stick to the steps we walked through, use the tools we supply, and you’ll be swapping dies in no time without any headaches. If you have questions, hit us up—we’re here to help.
Stamping Robot Reference: Stamping Press and Robot Integration Standards, Robotic Industrial Applications Manual, Occupational Safety and Health Administration (OSHA) guidelines for industrial machine operation, Die Design and Maintenance Handbook for Stamping Operations.
Dongguan Chuanglida Intelligent Equipments Co., Ltd.
As one of the most professional stamping robot manufacturers and suppliers in China, we also support customized service. Please feel free to buy discount stamping robot in stock here from our factory. For price consultation, contact us.
Address: Room 201, Building 2, No. 61, Shachang 1st Road, Dalang Town, Dongguan City, Guangdong Province
E-mail: haoguangli001@outlook.com
WebSite: https://www.boruntestech.com/
